If you are anything like us, you have probably spent too much time binge-watching numerous renovation shows and scrolling through Pinterest for interior design trim styles and inspiration. And if you are fortunate enough to call Windsor, Ontario, home, you know this city has its unique style and charm. So, why not infuse that Windsor flair into your living space?
This is where this post comes in handy! Today, we will dive into the world of interior house trim styles. Whether you are a DIY enthusiast or searching for a better way to do that home renovation project to spruce up your place, we’ve got you covered!
What are the Different Styles of Indoor Trim?
Before you start finding the ideal interior trim for your Windsor home, you must familiarize yourself with the wide range of styles available and know each “Trim Type” by name.
-
Crown Molding
This trim, angled to elegantly cover the junction of your walls and ceiling, adds a touch of sophistication to any room. Crown molding comes in various profiles, with broader pieces exuding formality, while narrower ones with simpler designs lend a more casual and contemporary feel. It’s typically applied along the seam where a wall meets the ceiling, enhancing the transition between these two surfaces.
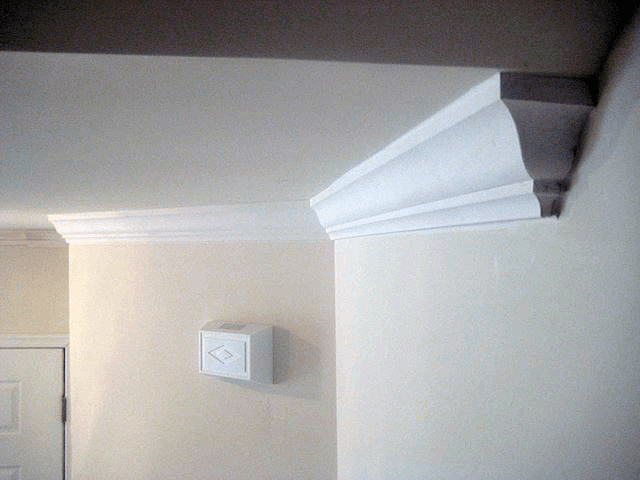
Crown molding is often ornate, featuring complex profiles that can add a sense of elegance and refinement to a space. Materials used for crown molding can vary, but commonly include wood, vinyl, and more commonly… medium-density fiberboard (MDF).
-
Door Casing
Door casing is designed to frame doorways and conceal the framing studs and shims used during door installation. You can opt for mitered corners or combine them with square blocks and straight-cut sections for a tailored look. More often, the trim is cut at a 45′ angle (mitered) and paired together with the top piece, to make straight squared corners.
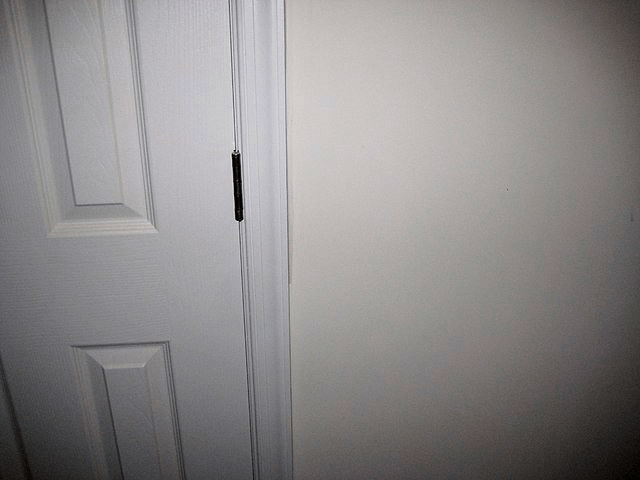
This again helps to cover up the gap between the wall and the door frame, preventing drafts and hiding imperfections. Door casings can come in various styles and materials, such as wood, vinyl, or MDF, to match the overall decor of a room or building.
-
Window Casing
Much like door casing, this popular trim, frames your windows and conceals any gaps around them. Window casing is a type of trim used to enhance your window’s aesthetic appeal and providing a finished look. It serves both functional and decorative purposes. Functionally, it helps in sealing gaps between the window and the wall, preventing air leaks and drafts. Decoratively, window casings can be customized to match the architectural style of a home, adding character and visual interest.
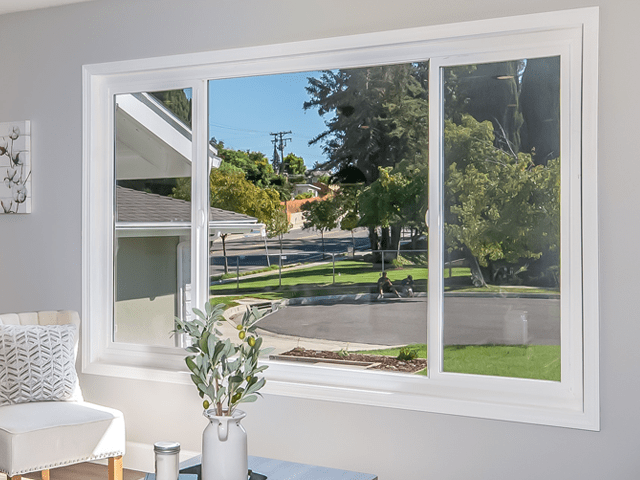
They come in various materials such as wood, vinyl, and MDF, each with its unique benefits and drawbacks. Although it once served a more functional purpose, it is primarily a decorative element today, as insulation foam usually seals the windows from the outside elements. Window and door casing can complement each other, though their proportions may vary based on window or door size.
-
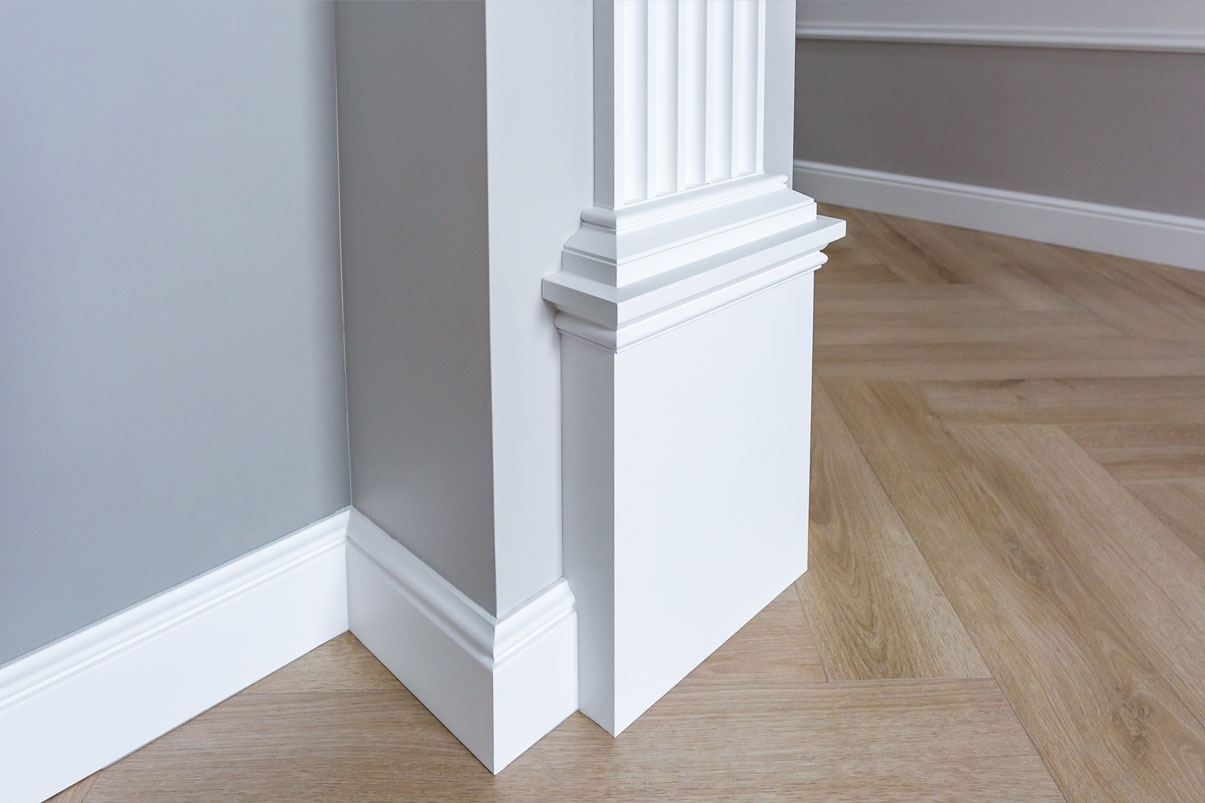
Baseboard
Baseboards, sometimes also known as “skirting boards”, are a type of home interior trim that serves both a decorative and functional purpose in home design. They cover the joint between the wall surface and the floor, effectively concealing any uneven edges or gaps. Baseboards can be made from various materials including wood, vinyl, and MDF, and come in different trim styles and heights to suit the aesthetic of the room.
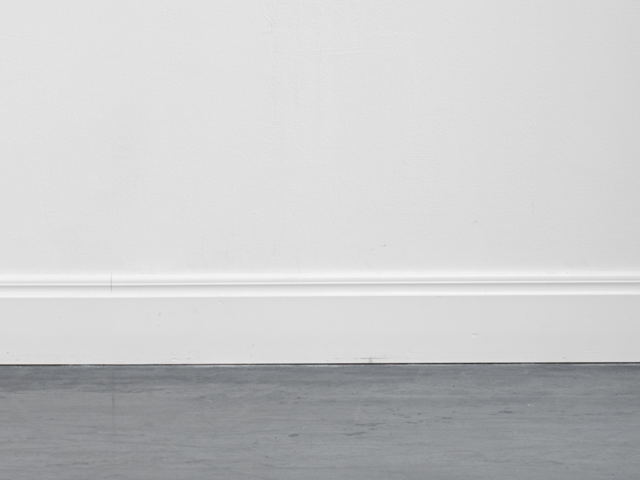
Besides their aesthetic role, they also help protect walls from kicks, abrasion, and furniture. Baseboards vary in design, shape and thickness from minimalist quarter rounds for modern spaces to several inches high for homes looking for a more royal look.
-
Chair Rail
Traditionally used to safeguard plaster walls from chair-related damage, “chair rail trim” is now a decorative feature. Typically, it’s mounted horizontally on the wall at chair-back height and is frequently found in formal dining rooms or as an accent to wainscoting (on top of the panel,as a trim). Usually installed about 32 inches to 36 inches from the floor. This can add architectural interest to a large room. The style and width of chair rails can vary greatly, depending on the decor and overall aesthetic of the space of your home.
-
Wainscoting
Wainscoting is a form of wall paneling that covers the lower part of an interior wall, typically up to waist height or higher, and can paired with chair rail. Originally used for insulation and protection against damage, it has evolved into a decorative element for home interior design.
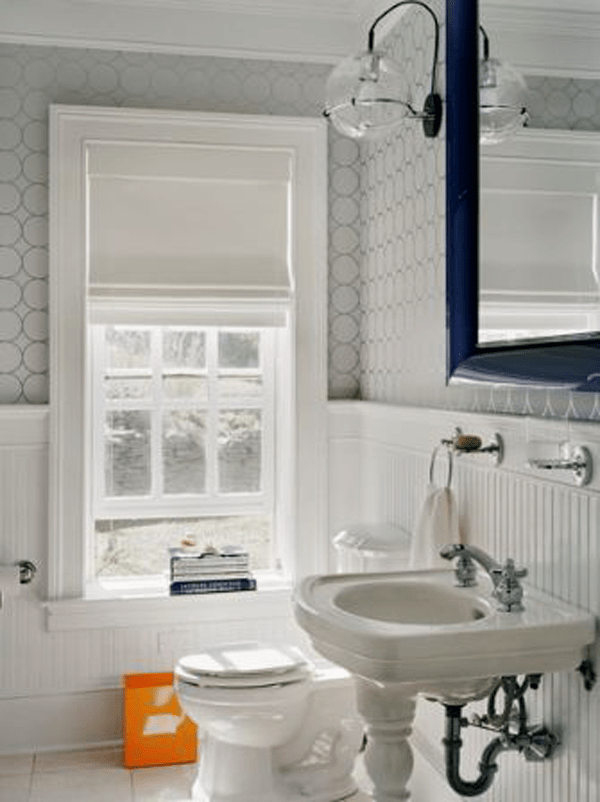
Wainscoting can be made from various materials, including wood, plaster, or MDF, and comes in different styles such as beadboard, board and batten, or raised panel. It adds architectural interest to a room and can enhance the overall aesthetic. It is often painted or stained in contrast to the wall above. While originally intended to waterproof plaster walls, wainscoting serves a purely aesthetic purpose today.
-
Panel Molding
Panel moulding comprises ridged trim pieces used to craft decorative frames on any wall or room in your home. These frames are affixed to walls to mimic raised panels, commonly employed in wainscoting or around fireplaces. The versatility of panel molding allows for many wall and ceiling patterns and can give more depth to a room, by dressing it up.
-
Shiplap Paneling (Accent Walls)
Horizontal placement of wide, interlocking boards forms shiplap paneling, a favored choice for creating rustic accent walls. In the southern regions, shiplap historically substituted plaster for interior wall construction. It’s characterized by long, horizontal planks that are fitted together via a rabbet joint on each edge, creating a distinctive overlap.
How to Bring Out Your Home’s Character with Trim Styles
Bringing out your home’s character with a piece of trim is like adding the perfect accessory to any home. It elevates the entire look and makes it uniquely yours. Whether you’re working with a cozy cottage or a modern masterpiece, here’s a step-by-step guide to help you transform your space with interior trim.
-
Know Your Home’s Style
Before you start running around with your nail gun, take a good look at the style of your home. Do you have Victorian homes? Does it have a colonial style, a mid-century modern, or a rustic farmhouse? Understanding your home’s architectural style will guide your trim choices. Windsor, Ontario, boasts a mix of architectural influences, so there’s something for everyone.
-
Select the Right Trim Profiles
Trim has various profiles, from sleek and minimal to ornate and detailed. Choose profiles that complement your home’s style. For instance, if you have a heritage home, ornate crown moulding and baseboards can enhance its charm. In a contemporary space, opt for clean lines and simple profiles.
-
Consider Material
Trim can be crafted from natural wood, MDF, or PVC for durability. Wood trim adds warmth and authenticity, while MDF and PVC are more affordable and low-maintenance options. Windsor’s climate may influence your choice, as wood can expand or contract with humidity changes.
-
Color Matters
Trim doesn’t have to be just white! Add a coat of paint. Paint a contrasting colour to make it pop, or choose a shade that complements your curved walls. Experiment with colour to achieve the desired effect. Windsor’s vibrant culture might inspire you to be adventurous with your choices.
-
Measure and Plan
Measure the length of each wall where you’ll install trim, and calculate how much you’ll need. Plan the placement of the trim carefully, ensuring it’s level and properly spaced. A laser level and a good measuring tape will be your best friends.
-
Installation
If you’re a DIY enthusiast, plenty of online tutorials and guides are available. If necessary, ensure you have the right tools, including a mitre saw, nails, and adhesive. If you’re uncomfortable with DIY, consider hiring a professional, as precision is key in trim.
-
Finishing Touches
Once the trim is in place, caulk gaps and fill nail holes. Sand the trim for a smooth finish, then paint or stain as desired. This final step can make all the difference in achieving a polished look.
-
Personalize
Don’t be afraid to get creative. Add decorative rosettes, corbels, or a chair rail for extra flair. Personalize your space with unique touches that reflect your personality.
-
Maintenance
Keep your trim looking its best with regular cleaning and touch-ups. Windsor’s climate can be unpredictable, so periodic maintenance is essential to ensure your trim stays in top shape.
-
Enjoy the Transformation
Sit back, relax, and admire the transformation of your home. Trim has the incredible power to accentuate your home’s character and bring out its hidden beauty.
How to Install Interior Wood Trim
Materials and Tools:
- Interior wood trim
- Measuring tape
- Miter saw or mitre box
- Nails and hammer or brad nailer
- Level
- Wood glue
- Sandpaper
- Caulk and caulk gun
- Wood putty or filler
- Paint or stain (optional)
Steps:
- Measure and Plan – Measure the walls and doorways and the entire board where you’ll install trim. Decide on trim type and style.
- Cut the Trim – Use a mitre saw for 45-degree angles (corners) and 90-degree angles (straight).
- Start with Trim Board (if applicable) – Apply wood glue and nail the baseboard along the walls.
- Install Door Casing and Window Trim – Start with the header piece, then the window trim. Ensure level and plumb placement.
- Install Crown Moulding (if applicable) – Measure and cut carefully. Glue and nail in place.
- Fill and Sand – Fill nail holes and gaps with wood putty and sand when dry.
- Caulk and Finish – Apply caulk along trim-wall seams. Paint or stain as desired.
- Final Inspection – Check for secure, level installation and a polished appearance.
How Much Does It Cost to Install Wood Trim?
Typically, the installation cost for trim per linear foot falls from $0.50 to $25. In 2023, the average price range of expenses for trim installation is estimated to range from $400 to $5,000, with a national average hovering around $1,400. It’s worth noting that outfitting an entire house with trim will naturally entail significantly higher costs than replacing trim in just one room.
Ready to Improve Your Home with Indoor Trim? Call Us Today!
At Truax Design Centre, we’re not just about installing beautiful interior wood trim; we’re here to transform your entire living space. Our commitment to quality craftsmanship extends across various services, including Truax Design Centre home design consultations, kitchen renovations and bathroom remodels, and window and door installations.

If you’re ready to elevate your home’s aesthetics, functionality, and value, now is the time to take action. Whether you dream of a modern kitchen makeover, a spa-like bathroom, or enhancing your home’s energy efficiency with new windows and doors, we’re here to turn your vision into reality.
Share This Article
Choose Your Platform: Facebook Twitter Google Plus Linkedin